Making a skull armature from recycled cardboard, tape and hot glue...a little something from nothing.

Showing posts with label Armatures. Show all posts
Showing posts with label Armatures. Show all posts
Monday, March 4, 2013


Monday, October 18, 2010
Scott's Anatomy
I’m not sure what you were expecting to read when you clicked on this post but it’s really not about any of my parts but rather about composing skeletal structures for props.
When it comes to designing my Halloween props I throw the anatomy charts out the window and go for a more stylized approach.
Currently I’m working on three torsos for my Warden characters and something I like to do is incorporate characteristics of the head into the body designs.
An example would be to take the shape of the eye sockets in skull and work that shape into ribcage…in the case of the Warden’s I have incorporated the shape of the teeth into the negative space of the rib.
In my mind this helps make the entire piece cohesive.
Here are some photos of the beginnings of the rib cage, cardboard was used to make a three dimensional shape which will be covered in papier mache strips then textured with papier clay.
.JPG)
.JPG)
.JPG)
.JPG)
.JPG)
Friday, July 24, 2009
Q&A: Sentinels
Questions regarding my projects and papier mache regularly fill my mailbox. In an effort to answer these questions and share information some of these questions will be regularly featured on this blog.

Jason wrote:
“What can be used other than the starch bottles ? I just don't use starch.”
Austin wrote:
“Hi, I was reading about how to make the halloween sentinals and i was just wondering what you used for the arms,hands, and collar bones. Thank you.”
The answer to the first question is any object will work to create the body armature for the Sentinels, I used starch bottles because I use liquid starch in my paste but any similiarily size and shaped bottle would work. Items that come to mind would be plastic juice containers, laundry detergent bottles, two liter pop bottles. My only advice would to make sure the container was relatively strong and resistant to crushing.
.JPG)
.JPG)
The arms, hands and collar bones were created from sheets of newspaper rolled into tubes then assembled with hot glue and tape to make the armature. The newspaper rolls were wrapped with masking tape for strength then coated with several layers of strip mache..JPG)

When creating the rib cage armatures for my creatures I always reference a photo or illustration of the human skeleton. The rolled tube of newspaper was flattened and bent to create the basic shape for the collarbone.
Jason wrote:
“What can be used other than the starch bottles ? I just don't use starch.”
Austin wrote:
“Hi, I was reading about how to make the halloween sentinals and i was just wondering what you used for the arms,hands, and collar bones. Thank you.”
The answer to the first question is any object will work to create the body armature for the Sentinels, I used starch bottles because I use liquid starch in my paste but any similiarily size and shaped bottle would work. Items that come to mind would be plastic juice containers, laundry detergent bottles, two liter pop bottles. My only advice would to make sure the container was relatively strong and resistant to crushing.
The arms, hands and collar bones were created from sheets of newspaper rolled into tubes then assembled with hot glue and tape to make the armature. The newspaper rolls were wrapped with masking tape for strength then coated with several layers of strip mache.
When creating the rib cage armatures for my creatures I always reference a photo or illustration of the human skeleton. The rolled tube of newspaper was flattened and bent to create the basic shape for the collarbone.
Fingers were created from small tubes of rolled newspaper and utility wire inserted into each finger.
Each finger was hot glued to a piece of corrugated cardboard cut into the shape of a palm.
Basic shapes all assembled to create the desired form.
Friday, August 8, 2008
My Naked Yard
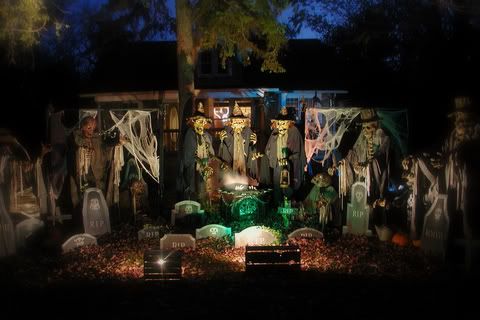
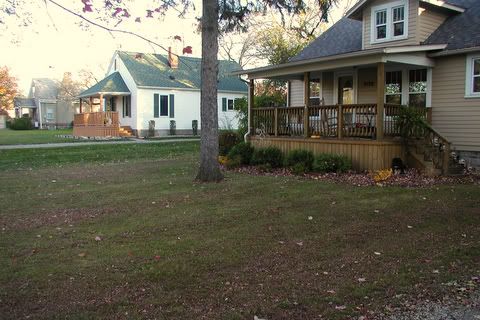
November 1st always seems to be one of the saddest days of the year for me because I wake up in the morning only to find my yard naked, a simple plot of grass, leaves and trees. After days of being home to an array of creatures, lights, music and fog my yard seems so barren and empty that it usually makes me sad.
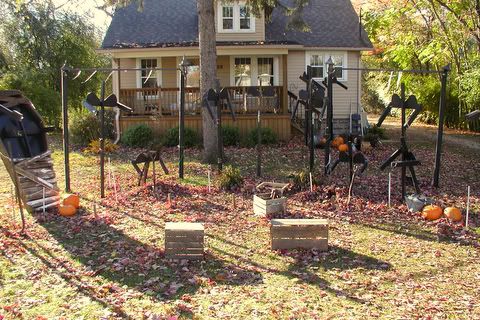
Here are a few photos of my yard on November 1st, 2007 and a quick behind the scenes of how I display and anchor my props.
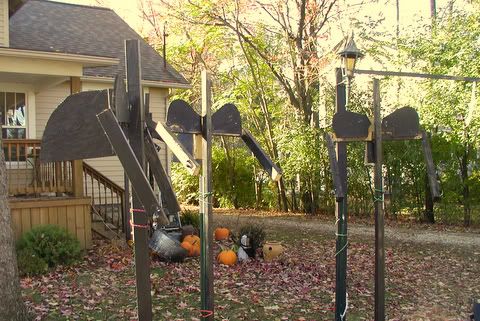
Here’s a quick over view of the “system” I use to display my props. My first priority is strength, as this year we got blasted with 40+ mph winds for several days. My second priority is ease of set-up. My third priority is storage.
The basic armature consists of 2’x4’s or 1’x3’s . The vertical center post determines the overall height, all of my heads contain a circular opening in the bottom and are simply placed on the top of the post. (Because they are not attached, the heads can easily be angled into different positions…looking up or down, to the right or left, or in a cocked position.)
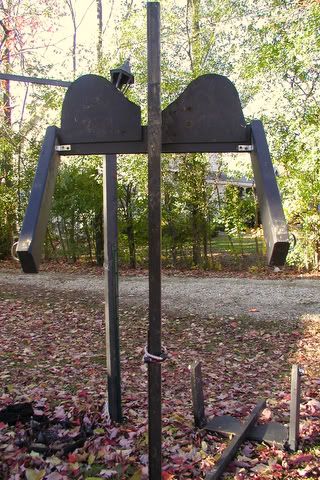
A piece of 2’x4’ creates the shoulders, and two additional pieces form the upper arms which can be mounted in various angles. Two pieces of plywood are attached to the cross board to create the illusion of shoulders or more accurately exaggerated shoulders.
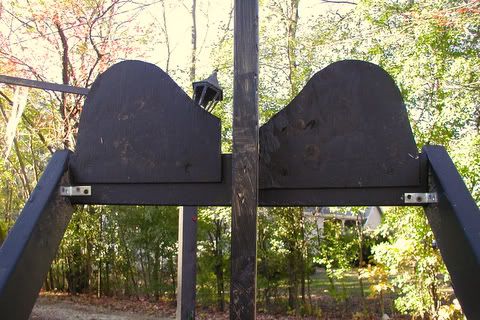
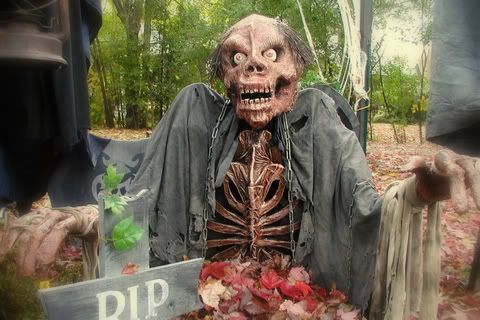
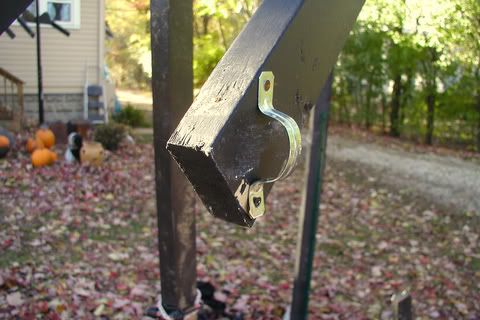
The papier mache hands and forearms are created onto furring strips. I left about seven inches of exposed furring strip on the back of the forearms which are attached to the upper arm structure via conduit brackets.
The ribcages or chest plates have an eyehook attached to them which allows them to simply be hung from a screw that is partially drilled into the vertical support column.
And finally, the entire armature is attached to a large fence post that has been sunk into the ground. Strong winds no problem. Set up is easy. And most importantly, tear down fast and simple.
-scott

Here are a few photos of my yard on November 1st, 2007 and a quick behind the scenes of how I display and anchor my props.
Here’s a quick over view of the “system” I use to display my props. My first priority is strength, as this year we got blasted with 40+ mph winds for several days. My second priority is ease of set-up. My third priority is storage.
The basic armature consists of 2’x4’s or 1’x3’s . The vertical center post determines the overall height, all of my heads contain a circular opening in the bottom and are simply placed on the top of the post. (Because they are not attached, the heads can easily be angled into different positions…looking up or down, to the right or left, or in a cocked position.)

A piece of 2’x4’ creates the shoulders, and two additional pieces form the upper arms which can be mounted in various angles. Two pieces of plywood are attached to the cross board to create the illusion of shoulders or more accurately exaggerated shoulders.


The papier mache hands and forearms are created onto furring strips. I left about seven inches of exposed furring strip on the back of the forearms which are attached to the upper arm structure via conduit brackets.

The ribcages or chest plates have an eyehook attached to them which allows them to simply be hung from a screw that is partially drilled into the vertical support column.
And finally, the entire armature is attached to a large fence post that has been sunk into the ground. Strong winds no problem. Set up is easy. And most importantly, tear down fast and simple.


-scott
Subscribe to:
Posts (Atom)
LinkWithin
