
In the mid 1970’s, Milton Bradley was selling the Shrunken Head Apple Sculpture Kit. Who could resist, especially since it featured Vincent Price’s face on the box.
The kit promised:
“Turn apples into Shrunken Heads with the SHRUNKEN HEAD Apple Sculpture kit. Before you know it, you’ll have Shrunken Heads hanging from your belt. Or around you neck. Buy you kit now and get a Had-start on your friends! Having a Shrunken Head is like having Halloween year ‘round! You’ll find SHRUNKEN HEAD Apple Sculpture kits where ever toys and crafts are sold. Look for Vincent Prince’s pretty face on the cover.”
I stumbled across the Shrunken Head kit several years ago on Ebay and while I never had a Shrunken Head kit, I thought it would be cool to make some shrunken apple heads.
After searching the internet I found some basic information on how to make these groovy wonders and through some trial and error developed an easy method to make Shrunken Apple Heads which I call “Shrunkles.”

Materials Needed:
Apples (see below)
Salt
Lemon Juice
Water
Large Bucket
Carving and Peeling Tools (see below)
Screens
Box Fan
Kitchen Oven
Brown or Black Acrylic Paint
Clear Polyurethane Sealant
Cotton Swabs
Twine or Wire
Material for Eyes (see below)
Hot Glue Gun
Glue Sticks
Lots of Time

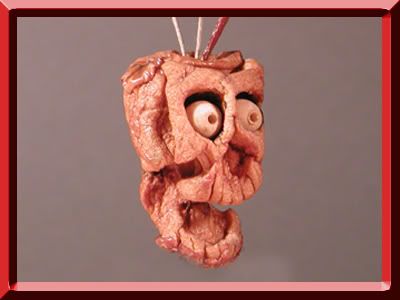
Making shrunken apple heads is a lot of fun and a great activity with the kids. The entire process takes about 4 weeks to complete, so if you want some for Halloween you had best start sometime in September.
Let’s get started!
Fill a bucket that is large enough to hold all the apples you plan on making with cold water.
Add approximately ¼ cup lemon juice and ¼ cup salt per gallon of water used.
The salt and lemon juice will prevent the carved apples from oxidizing, or turning brown when exposed to the air.
Peel your apples. Any variety of apple will work, but I have found that Red Delicious or Yellow Delicious apples produce the best results.
When peeling leave a fair amount of skin on the top of the apple around the stem and at the base of the apple. (see photo below)
Place peeled apples in the water/lemon/salt mixture.
Now it’s creative time, time to carve the faces! Don’t fear, this is the fun part, trust me. You will need an assortment of carving tools: different size knives, x-acto knives, toothpicks, peelers, chopsticks, cookie cutters, caps to ink pens and markers and cheap clay carving tools available at a dollar store.
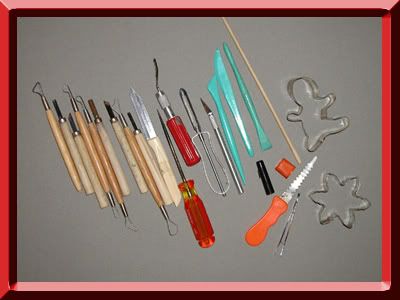
Start with the eyes. Take the cap from a pen or marker and punch it into the apple where you want the eyes. When you remove the pen cap from the apple you will have a perfect circle cut into the apple, simply use a toothpick or small knife to remove the apple from the middle of the cut.
Next use a knife or other tool to create the basic shape of the face. Study the photos below and you can see how I used a simple tools to create the basic face shape. Don’t worry about details or smoothness, remember, the apples are going to shrink and shrivel so all you need to do is to create rough shapes determining the eyes, nose and mouth. The pictures illustrate the technique much better than an explanation.
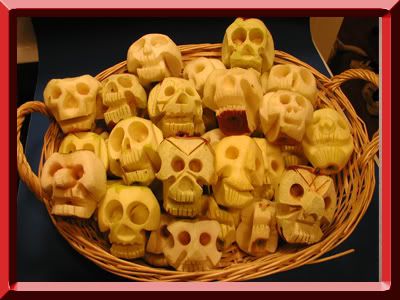
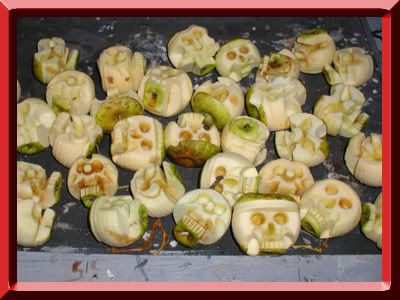
After the faces have been carved in the apples, let them soak in the water/lemon/salt mixture for several hours.
Once the carved apples have soaked, place on a screen or some other surface that will allow complete air circulation. Use a box fan to continuously circulate the air, this speeds up the drying process considerably.
Check the apples every few days and if necessary you can use your fingers to maintain the shape of the eyes, nose or mouth if it is drying or shriveling in a strange fashion.
After a couple of weeks (or longer depending on humidity) your apples should have shrunk to their final size. To insure that all the moisture is removed, put the apples on a cookie sheet and place in a warm (under 200 degrees F) oven for about four hours.
Our Shrunken Apple Heads are used as ornaments on a Halloween tree, so using an awl, a hole is punched through the core of the apple, then wire or twine is threaded through the hole to create a loop for hanging.
Once the apples have completely dried, either spray or dip them in a polyurethane seal sealant and let dry. The apples should now last for years without any worry about mold or rotting, just make sure they are completely dry before you seal them.
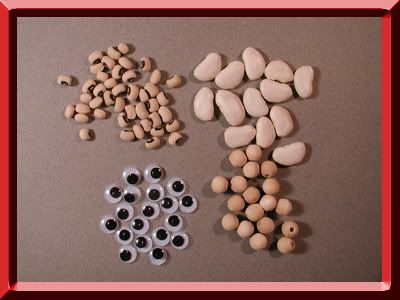
One final thing I like to do with the apple heads is to give them eyes. Eyes tend to give them a lot of personality. Before inserting the eyes, the sockets are painted using a dark brown acrylic paint and cotton swab. Let dry. Wooden beads, black eyed peas, lima beans or wiggly eyes from a craft store can then be glued into the eye socket.
Have fun with your shrunken apple heads.
Experiment! Create! Amaze your friends!

2 comments:
These are awesome! I'll be adding them to my Halloween tree this year.
BTW, I linked to you from my blog: crazyforhalloween.blogspot.com.
These are awesome - I remember making these when I was younger, but mine never looked that good. I shared this on my FB for others to see - Great Job !!!
Post a Comment